The one-bedroom, one-bathroom condo presents a unique and compelling renovation challenge. It is a compact universe where every square foot must perform multiple duties and every design choice resonates throughout the entire space. Unlike a single-room project in a larger home, a full condo renovation is a holistic endeavor. A change in the flooring here affects the perception of space in the living area; a decision about the bathroom layout can influence the storage solutions in the bedroom. This is the art of micro-optimization, where the goal is not merely to update, but to intelligently reconfigure and refine a limited footprint to feel more spacious, functional, and valuable. Success here is measured in inches and in the clever integration of storage, light, and flow.
The Condo Renovation Mindset: Precision Over Power
The driving philosophy for a condo renovation must be one of strategic precision. The budget and scope cannot afford wasted motion or misguided attempts to mimic trends from larger homes. The primary objective is almost always to enhance the perception of space and to solve specific, acute pain points related to storage and functionality. This requires a forensic approach to the existing layout. Before any demolition, one must ask: Where does the natural light fall? Where are the unavoidable obstructions like plumbing stacks or structural columns? How does traffic flow from the entry to the main living areas? The renovation must work with these fixed parameters, not against them.
Furthermore, the condo association adds a critical layer of complexity. Their Covenants, Conditions, and Restrictions (CC&Rs) can dictate everything from permissible flooring materials (often requiring specific underlayment for soundproofing) to the approval process for any plumbing or electrical work that affects common lines. A successful project begins with a thorough review of these rules and open communication with the HOA to secure necessary approvals, avoiding costly fines or work stoppage.
Strategic Allocation of a Condo Renovation Budget
For a typical 600-800 square foot condo, a full renovation with professional labor and mid-range materials can range from $25,000 to $60,000. The following table outlines a realistic allocation for a comprehensive, quality-focused update.
| Category | Allocated Budget (%) | Purpose & Key Considerations |
|---|---|---|
| Labor & Professional Fees | 35% – 45% | General contractor, skilled trades (plumber, electrician, tile setter). Higher labor density due to tight workspace. |
| Kitchen Renovation | 25% – 35% | The highest-impact area. Cabinets, countertops, appliances, flooring. |
| Bathroom Renovation | 15% – 25% | The second most critical space. Vanity, tub/shower, tile, fixtures. |
| Flooring, Paint, & Lighting | 10% – 15% | Unifying the entire space. Consistent flooring, professional painting, updated fixtures. |
| Contingency Fund | 10% – 15% | Non-negotiable for unforeseen issues like concrete subfloor leveling or outdated electrical. |
The Kitchen: The Command Center of the Condo
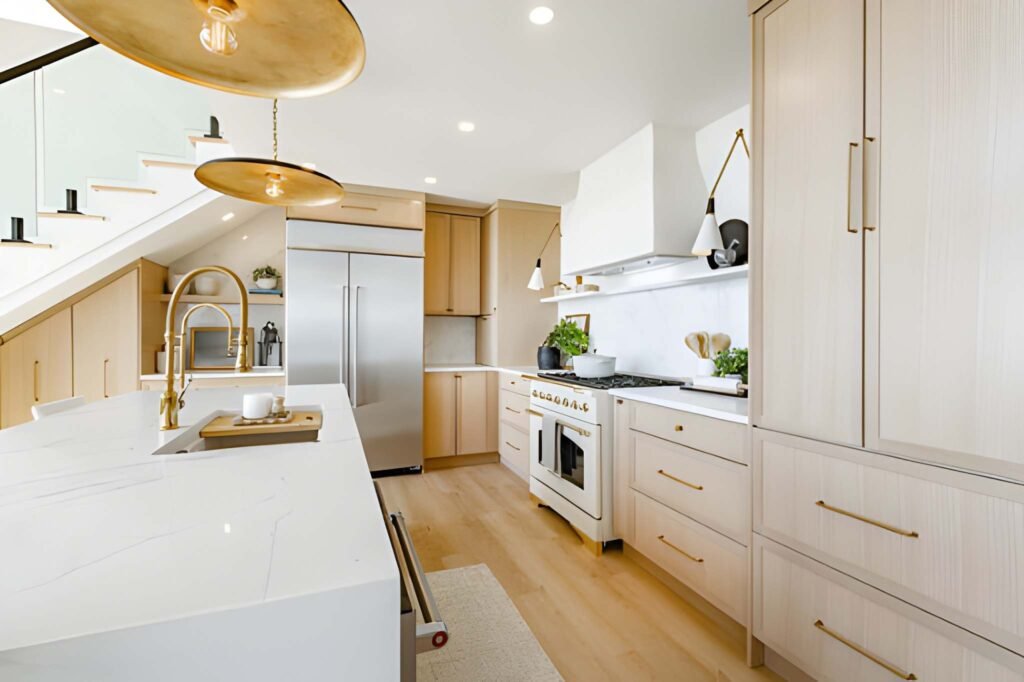
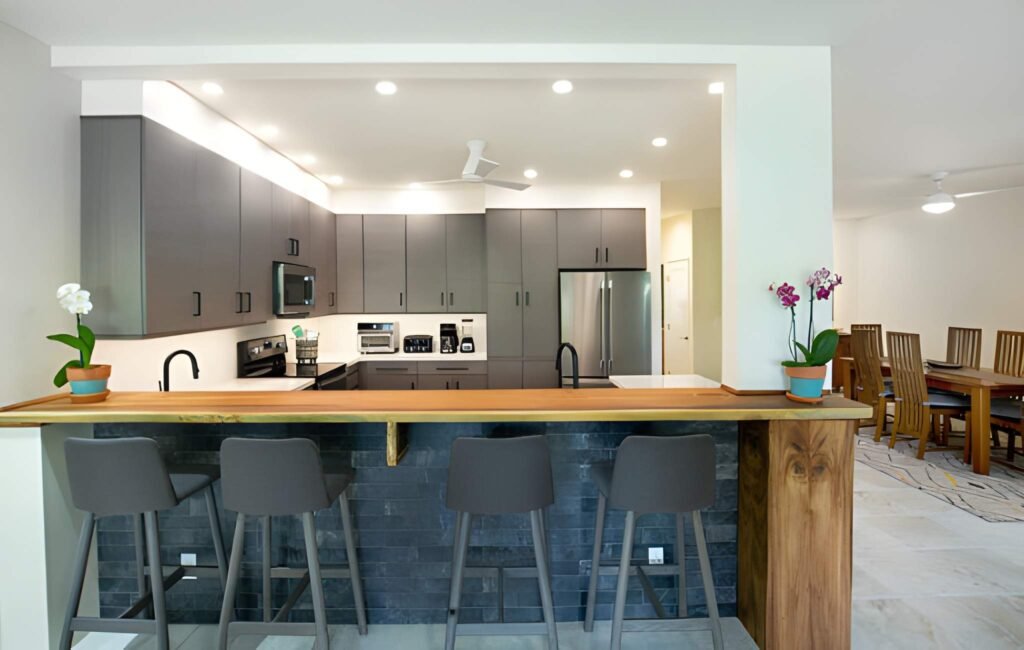
In a 1-bedroom condo, the kitchen is rarely just a place to cook; it is often part of the living area, visible from the entry and central to the home’s identity. The renovation strategy must prioritize visual lightness and multifunctionality.
Layout and Space-Saving Solutions: The goal is to maximize storage and counter space without making the area feel crowded.
- Galley or L-Shaped Layouts: These are typically the most efficient for small spaces, creating a clear work triangle.
- Remove Upper Cabinets: In a tight kitchen, a solid wall of upper cabinets can be oppressive. Consider removing uppers on one side and replacing them with open shelving. This maintains storage for everyday items while creating a sense of airiness.
- Full-Height Pantry Cabinet: A single, tall, and narrow pantry cabinet can provide more practical storage than several base cabinets, housing everything from food to cleaning supplies.
- Appliance Strategy: Opt for a slim-profile refrigerator and a range rather than a bulkier fridge and separate wall oven. Consider integrating the microwave into a base cabinet drawer to free up counter space.
Material and Finish Choices:
- Cabinetry: Light-colored, slab-style cabinet doors in a satin finish create a clean, modern look that reflects light. Going all the way to the ceiling with cabinets provides maximum storage and eliminates dust-collecting gaps.
- Countertops: A light quartz with a subtle veining pattern can make the space feel larger. A single slab with a square edge (instead of a bulky bullnose) contributes to a sleek, uninterrupted line.
- Backsplash: Using the same material as the countertop for the backsplash creates a seamless, expansive look. Alternatively, a large-format light-colored tile with minimal grout lines achieves a similar effect.
The Bathroom: The Efficient Sanctuary
The bathroom in a 1-bed condo must be a model of efficiency. There is no room for wasted space.
Layout and Fixture Optimization:
- The Shower-Tub Dilemma: Replacing a bulky tub-shower combo with a well-designed, curbless shower with a frameless glass enclosure can make the room feel significantly larger. If a tub is necessary, a sleek, acrylic tub with a tile surround is more space-efficient than a cast-iron model.
- Vanity and Storage: A wall-mounted (floating) vanity opens up the floor space, making the room appear larger. Choose a vanity with deep drawers instead of doors for more accessible storage. A large mirror or a mirrored medicine cabinet provides reflection and crucial storage for toiletries.
- The Pocket Door: If the layout allows, replacing a standard swing door with a pocket door can reclaim a surprising amount of functional floor space.
Material and Finish Choices:
- Large-Format Tiles: Using large tiles on both the floor and the shower walls reduces visual clutter from numerous grout lines, making the room feel more expansive.
- Consistent Color Palette: A monochromatic scheme, such as various tones of gray or beige, creates a calm, unified atmosphere. Use a single, bold color or pattern only as a small, contained accent.
Unifying the Entire Space: Flow and Cohesion
The magic of a well-renovated condo lies in the elements that tie the separate rooms into a single, harmonious whole.
- Consistent Flooring: The most powerful tool for creating a sense of flow is installing the same flooring throughout the entire condo (excluding the bathroom, where tile is practical). Luxury Vinyl Plank (LVP) in a light, wood-look finish is an ideal choice—it is durable, affordable, and visually continuous.
- A Cohesive Color Palette: Painting the entire condo, including the bedroom, in a single, light, neutral color (e.g., a warm white, a pale gray) makes the space feel like one continuous volume. Accent colors can be introduced through artwork, textiles, and accessories.
- Strategic Lighting: Replace all dated, builder-grade light fixtures. In the main living area, a single statement fixture can define the space. Use recessed lighting for general illumination and wall sconces or floor lamps to create layers of light. Dimmer switches are a low-cost upgrade that dramatically affects ambiance.
- The “Fourth Wall” in the Bedroom: Since the bedroom is often small, treat the wall facing the bed as a focal point. This could be an accent wall with a bold paint color, wallpaper, or a built-in headboard with integrated nightstands and lighting to save space.
A one-bedroom, one-bath condo renovation is a test of discipline and creativity. It forces a focus on what is truly essential, rewarding intelligent choices that enhance both form and function. By treating the condo as a single, integrated system—where the kitchen conversation influences the bathroom choices, and the flooring decision unifies the entire home—a homeowner can transform a compact footprint into a residence that feels far more spacious, organized, and valuable than its square footage would suggest. It is the ultimate proof that in design, less truly can be more.